Getting to Know You
“Are you taking pictures for National Geographic?”
 A 500mm f4 lens attracts this kind of attention. Brent turned to the woman. “Why? Do you represent them? Are you buying photos for National Geographic?”
The man next to us laughed out loud, shattering the quiet at Ding Darling National Wildlife Refuge. “I’m going to use that line!” exclaimed Andy Long, assistant editor of Nature Photographer magazine.
What if we all photographed UP TO the quality reproduced in National Geographic, Ranger Rick, Audubon, Natural History, and other nature magazines? Think of how far our art would expand and grow. The strive towards perfection in natural imagery would be very exciting.
Getting to know you
How do you get such a high quality natural image, especially with uncontrollable wildlife? Three qualities come together to make a successful wildlife photograph: an understanding of the subject; a good, balanced composition; and good photographic technique. Most important of the three is understanding the natural history of your subject.
It’s no secret that most good wildlife photographers are also good naturalists, or at least they are knowledgeable about the subjects they like to capture on film. If you don’t know your subject, you’ll have to rely on blind luck to lead you to whatever subjects you encounter.
Joe McDonald, Designing Wildlife Photographs
“To be a better nature photographer, be a better naturalist. This means understanding the subject, not just in a dry textbook sense, but knowing your subject through constant contact and observation in the field. The more you know about nature, the more you will see to photograph,” explains John Shaw, renowned nature photographer and author.
The relationship of the animal to its environment and how it feeds and survives are important parts of the animal’s natural history. Getting to know your subject not only helps you to know what you’re photographing, but it helps you to anticipate what it will do next.

We’ve photographed seven or eight different kinds of herons, and superficially, they all look the same. Yet, they have different habits and fishing styles. It’s the way they act, the personalities of the animals, that makes them special. The great egret stands perfectly still in the water until he sees the fish he wants and then strikes to grab it with his bill. The snowy egret walks through the water stirring things up with his feet and catches the fish that move out of the way. The reddish egret runs all over the pond scaring and surprising the fish and scattering them in all directions. Then there is the green heron who doesn’t even get wet. He’ll stand on a branch 6 – 12 inches above the water and strike from there.
Without being able to see the colors of the bird, we recognize different herons just by their feeding styles. If we want a photo of a reddish egret, we don’t have to wait until we’re close enough to notice the colors, we can spot it by its behavior and know this is the bird we need to go after. Understanding how they feed, we can capture the behavior accordingly.
 You can improve the quality of your natural images by learning about your subject and keeping the following in mind:
- Find something special
- There is something special about every animal that sets it apart from all others. Some fish, some fly, some stalk, some climb, and some burrow in the ground. Find what is unique and special about that animal and show it to us on film.
- Looking good when and where
- Understanding behaviors, habits and lifestyles of your subject, you know when to get them in their best “outfits.” Most mammals look their best in the fall with their full winter coats. By spring, they are shedding, underweight and don’t make attractive subjects. Baby mammals, though, are new, soft and cuddly in the spring. Birds are at their peak for the spring fashion show. They get all dressed up with feathers new and colorful to put on their best courtship dance, oblivious to your presence.
- Visit visited places
 The image of a wildlife photographer tramping through the unvisited locales of the world, overdressed in camouflage, is largely a fantasy. Most photographers have more success by visiting areas where animals are habituated to human presence. National parks and refuges are places where, all year long, the animals have learned that people are not a threat. Visit these and photograph behaviors and actions without disturbing the animals by your presence.
- Catch the peak action
- While portraits are nice, there is nothing like the scream of a marmot or the heron striking for fish. By learning the clues, you can predict behavior and catch the peak action, adding drama to your images.
The Balancing Act: Composition
 Lacking the care and sensitivity of an alert photographer, even the best opportunity can produce mediocre results. Good composition is more than just getting the subject out of the center of the frame. You need to pay attention to the background, the balance of colors and shapes, and the direction of light. You must move forward or backward, higher or lower as your artistic eye dictates. You take the pictures when all the elements come together.
Composition is subject to perspective and interpretation. Here are our tips for improving the quality of your nature images:
- Frame it
- A successful nature image takes into consideration the subject’s position in the frame. Is the animal moving into or out of the frame? Is there room for the animal to move? We follow the eyes of our subject, looking where they look and following their path. Leave enough space in the photo for the animal to look or move into.
- Watch the light!
 Composition also takes into consideration the balancing act of light. Bright overcast skies are the best for middle of the day wildlife images, including insects and small creatures. Especially with furry creatures, the bright diffused light allows their natural colors to show. Early morning and late afternoon (sunrise and sunset) are wonderful for adding warmth. At this lower angle, the sun is in a good position to provide the catch light in the eye.
- Catch the light!
- The catch-light in the eye is a compositional element that cannot be stressed enough. Without a glint in the eye, the animal appears dead and lifeless. Watch closely through your viewfinder and click the shutter when the head turns and the light sparkles in the eyes. That little light brings out the life in the creatures, making them glow with vitality.
- Animal butchering
 When filling the frame with a close-up of an animal, you are challenged with the decision of where to “cut”. We call this compositional consideration “animal butchering.” If you exclude small pieces like feet, people may spend time wondering where they are. Cut off the tip of an antler and we follow it up and out of the frame. We recommend cutting at major joints, just above the hips, knees and such, framing your image for a more comfortable composition.
- Tackle the heart and tell a story
 Great photographs don’t need words to tell their story, they tell their own. They impact the viewer emotionally. Many nature photographers catalog their images not just by subject and location, but by emotional content. Animals are so expressive, if you can capture an image which illustrates a definable concept, then that image is not only more saleable but more powerful. Two black tail deer fawns sniffing noses tells of togetherness, sharing, caring, love, curiosity, hope, and brings smiles to people’s faces. Images that represent relationships, intimacy, celebration, growth, tension, surprise, learning, decision-making, winning, weakness, danger, motion, and pride help identify the “story” behind the picture. When you see a story unfolding, make sure the camera is ready and the continuous focus and advance is on.
Good Photo Technique

Equipment is just a tool. How often I’ve heard, ‘Gee, you must have a good lens.’ Yes, as a professional photographer I do own some good optics, but not once has one of them gone out and produced a photograph all by itself.
John Shaw
The Nature Photographer’s Complete Guide to Professional Field Techniques
Just as you must get to know your wildlife subject, you must apply the same discipline to your equipment. When the coyote  leaps into the air to plunge through the snow for his dinner is not the time to learn how to put film in the camera or figure out how to focus. No matter what system you choose, understand how it works, how it sees and what it’s capable of in the field. Practice changing lenses, changing film, working with it over and over again until it becomes a part of you. You need to move without thinking, concentrating on the subject and not the equipment. More photographs are lost due to delays with equipment than any other excuse.
 The equipment required for nature photography covers a wide spectrum. For large mammals, like grizzly bears, a 500mm or 600mm f 4 lens is appropriate to get frame-filling images while staying further back. At other times, a 28mm to 35mm wide angle lens is great for a scenic of the grizzly as an element in the image. There is no “right” equipment for nature photography. It depends upon your interest and versatility. Here are some tips and tools for improving your chances of getting that successful wildlife image.
- Autofocus
- When subjects move, it’s exceptionally difficult to follow focus or keep the subject in focus, particularly when the animal comes straight at the camera. Autofocus improves the odds of a sharply focused image, allowing you to concentrate on composition.
- Tripod
 A sturdy tripod is a must. It must be sturdy enough to solidly support the biggest lens you may own. For best results, choose a tripod that weighs twice as much as the largest lens and camera combination you will use.
- A fast and long lens
- A “fast” lens has a large maximum aperture, allowing high shutter speeds at low light levels. As many animals are out in the early morning or late evening, the challenge is finding enough light to get a decent shutter speed. A long lens is critical to helping get close to the wildlife. From 300mm to 600mm is required – longer is better.
- Motor Drive
- An automatic film advance or motor drive on your camera is critical. This advances the film quickly, without action by you. A green heron may wait for ages before striking for dinner, but when it does, you can fire off short bursts of photographs with ease.
Creating Quality Images
 We wish there was a handy button on a camera that, when pushed, guaranteed the best quality image possible. Unfortunately, it’s not that easy. Good technique is critical, as is choosing good compositional elements with a good looking subject. All falls by the wayside without the understanding and appreciation that comes with learning about your subject and working with it over a long period of time.
 There are two main choices for a 500mm lens. One is a regular 500mm lens with the widest aperture an f 4. It is expensive, huge, weighs a ton, and requires a sturdy tripod to support. The 500mm “mirror” lens features a wide aperture of f 8, twice that of the f 4 lens. It is very inexpensive, much lighter and smaller, and requires no special equipment. Sounds like the choice is easy, right?
Unfortunately, while the f 4 lens allows for variable lens apertures from f 4 to f 32, the 500mm mirror lens is restricted to f 8. The mirror in the smaller lens also creates “donut holes” with light colored subjects out of focus in the background, as the mirror in the lens distorts them. If you are serious about your wildlife images, spend the extra thousands to invest in the serious lens. If you are just into it for the fun, go with the lighter and cheaper mirror lens. Your back will also enjoy it more.
 I’m working on a new article for the site on the impact of
  Most people think of photography as a “visual” art. It is, but it also represents a “verbal” art form. Photograhy often expresses what most people hard find to say.
 Patterns are great for backgrounds as well as for use on printed papers and stationery. Wrapping paper, book covers, folders, notebooks, calendars, coffee mugs, and all kinds of things feature photographs. Study the types of images they use. Lots of animals, scenics, flowers, or patterns? Write down a list of what you find.
 Consider exploring verbal descriptions through the use of a dictionary and thesaurus to expand your visual repertoire. The more visual concepts you develop, the wider the perspective of your subject may grow.
  You have to get up early in the morning to catch dew on most things, but especially early when tracking down dew covered spider webs.
 Rising up a little with the tripod gave him the non-descript soft green background he sought. Nothing to distract. He added the 1.4x teleconverter, increasing the magnification and narrowing the background. Holding his breath, he snapped off five or six shots. He played with aperture and shutter, increasing the depth of field on the web but controlling it on the background.
 What makes this image magic? Its tension. Its beauty. Its simplicity. You know immediately what it is and yet you wonder what it is and how it was done.
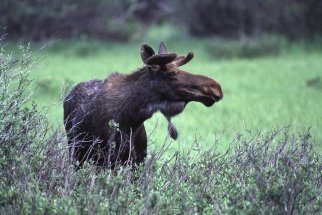 When you think of Alaska, don’t you imagine it as the last refuge for large wild animals in the Northern Hemisphere? A place where elk, caribou, moose, and bear still wander wild and free? On our first trip to Alaska, we were sure we would return with film covered with all things wild and woolly.
 After a week of sneers and stabs, we called a truce. “We’re in Alaska!” I shouted, “Who cares about anything else!”
 A few days later we did find some moose and bear, but by then we were relaxed and more casual about the event, ready with our cameras, our attitudes in place. We returned to Seattle with glorious images of snow-capped mountain scenes, icebergs floating on Portage Lake, fall colors on the tundra of Denali, brilliant red high bush cranberries glistening with water droplets, fascinating patterns of trees and plant life, and a few bear and moose pictures, along with a lot of Arctic ground squirrels. We returned happy, the most important thing.
 Before we knew it, we pushed those self-imposed limits and started “seeing” things differently through the equipment we had instead of regretting what we didn’t have. Brent dusted off his wide angle lens and started “seeing” the world through an even wider perspective. Stuck with only one tripod, we propped our cameras up on the floor, benches, window sills, and anywhere, using coats, hats, and tour guide books to aim our lenses for long low-light exposures.
 This WordPress plugin doesn’t just search the Codex, it searches both the Codex and the WordPress Forum, and does it from within the WordPress Administration Panels. You don’t even have to leave your control panels for WordPress to find the help you need. Wow!
 In the upper part of the list you will find titles and excerpts of articles from the WordPress Codex. There are usually enough words in the excerpt to help you determine if the information in that article is what you need.
 To open any of these results and not leave the comfort of your WordPress Admin Panels, right click on the link and choose “Open in New Window” or “Open in New Tab”. That will open a new browser window or tab and load that link into it so you can keep WordPress open and read about how to solve the issue at hand or answer your question. You can quickly click between the two pages if you need to attempt the solution and continue to refer to the information. Nice and easy.